I’ve had my fair share of sad, soggy, rubbery chicken moments in the kitchen. You know the kind — pale, kind of steamed, kind of confused. And every time I’d end up scrolling through delivery apps at 9pm wondering where dinner went wrong. Then I stumbled onto this chicken cutlet recipe, and honestly? Game over. The takeout app has been collecting dust ever since.
This isn’t some complicated, fancy restaurant thing. It’s pantry ingredients, a hot pan, and about 30 minutes of your life. But the results look and taste like you absolutely knew what you were doing the whole time.
Why This Chicken Cutlets Recipe Actually Works
There are a lot of breaded chicken recipes floating around the internet. So what makes this one different? It comes down to three things: the Panko, the Parmesan, and the pound.
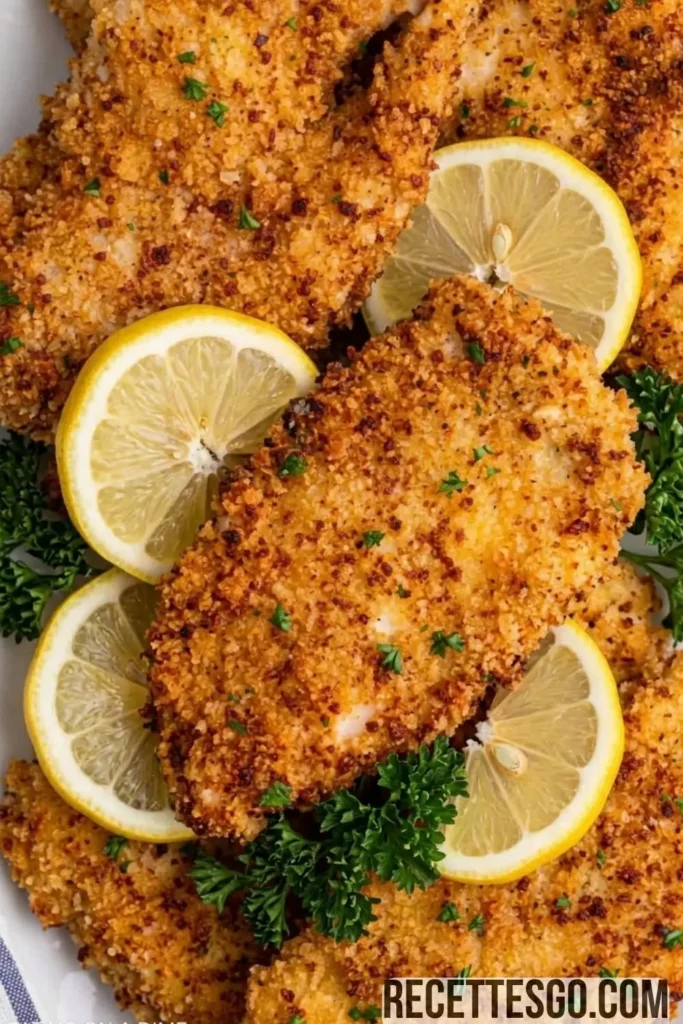
Panko bread crumbs are those light, flaky Japanese-style crumbs that puff up when they hit hot oil rather than just absorbing it. That’s where the shatter-crunch comes from. Then you mix in a full cup of finely grated Parmesan — not the stuff in the green can, please — and suddenly your coating has this deep, nutty, salty flavor that regular breadcrumbs could never compete with.
And the pound? That’s the move most people skip, and they really shouldn’t. Getting each piece of chicken to an even ½-inch thickness means everything cooks at the same rate. No more biting into a cutlet and finding one end perfectly golden while the other is still doing its raw thing.
What You’ll Need — No Fancy Stuff, Promise
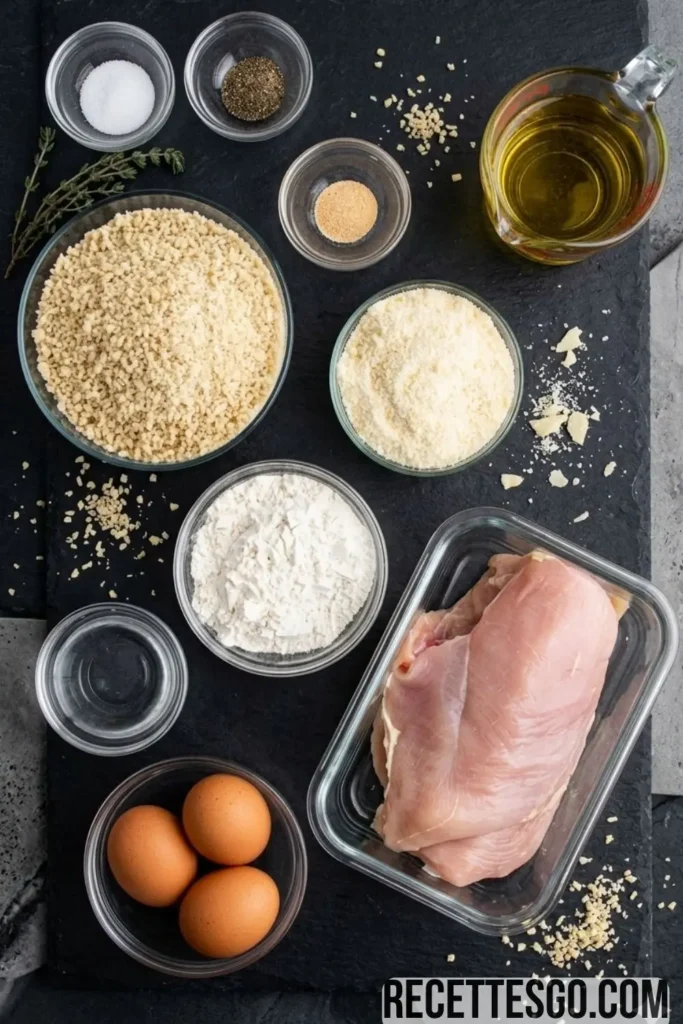
Here’s the thing about this chicken cutlets recipe — there’s a really good chance you have most of this already sitting in your kitchen right now. The star of the show is 2 pounds of boneless skinless chicken breasts, which you’ll fillet and pound into about 8 thin pieces. Beyond that, it’s all very normal pantry territory.
The breading mixture is Panko bread crumbs, finely grated Parmesan cheese, garlic powder, black pepper, and salt. The egg wash is just eggs and a splash of water. And you dredge everything in plain all-purpose flour first to give the egg something to hold onto. Olive oil for frying — that’s it. Nothing obscure, nothing requiring a special trip to a specialty store. Just good ingredients doing their jobs really well.
Quick tip on the Parmesan: Finely grated is key here. The coarser the shred, the harder it is for it to stick evenly in the coating. If you have a microplane, this is its moment to shine.
The Breading Process — It’s a Three-Bowl Kind of Night
Yep, three bowls. I know, I know — dishes. But this is the classic flour-egg-breadcrumb setup and it genuinely cannot be shortcutted if you want that coating to stick and stay through the whole fry. Each layer has a job.
Bowl 1: The Flour Dredge
Flour first. Coat both sides of the chicken, shake off the excess. This creates a dry surface that the egg wash can grip. Skip it and your breading will slide right off in the pan. Ask me how I know.
Bowl 2: The Egg Wash
Whisk 3 large eggs with 2 tablespoons of water. After the flour, dip each piece in here and let the excess drip back into the bowl — you don’t want puddles of egg going into your breadcrumbs. That’s how clumps happen.
Bowl 3: The Parmesan Panko Mix
This is the good stuff. Press the chicken firmly into the breadcrumb mixture on both sides. Press. Don’t just dip and shake. You want full coverage, good contact, and a generous coating that’ll turn shatteringly crispy in the pan.
Pro Tip: Once all the chicken is coated, you can let it rest on a plate for 5–10 minutes before frying. That short rest helps the coating set and means less falloff in the pan.
Frying Tips — Getting That Perfect Golden Crust
This is where a lot of home cooks get tripped up, so let’s talk about the fry. You want a thin layer of olive oil in a large skillet over medium-high heat. The target temperature is 350–375°F. If you don’t have a thermometer, do the breadcrumb test — drop a pinch into the oil. If it sizzles immediately, you’re good. If it just sits there looking sad, wait a bit longer.
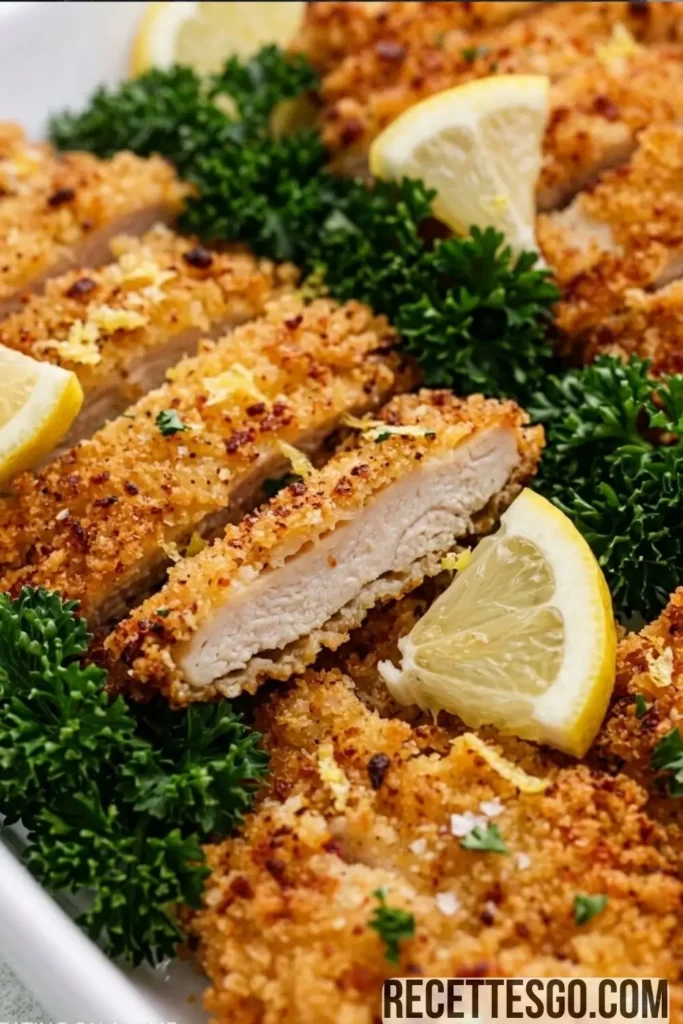
Don’t crowd the pan. I know it’s tempting to get them all in at once, but overcrowding drops the oil temperature and you end up steaming the chicken instead of frying it. Work in batches. Each side needs just 1–2 minutes — you’re looking for deep golden brown and an internal temperature of 165°F.
When they come out, transfer them straight to a plate lined with paper towels. And here’s a detail that makes a difference — sprinkle the tops with that remaining ¾ teaspoon of salt right when they come out of the pan. Hot food absorbs seasoning better. Then let everything rest for at least 5 minutes. I know the smell is distracting. Just wait.
How to Serve Your Chicken Cutlet
One of the best things about a great chicken cutlet is how incredibly versatile it is. You can go casual weeknight dinner, fancy it up for guests, stuff it in a sandwich — literally anything works.
- Over pasta with marinara
- Sliced on a salad
- In a sandwich with arugula + lemon aioli
- Alongside roasted veggies
- With mashed potatoes + gravy
- Chicken Parmesan style
- Tucked into a wrap
Honestly, I’ve eaten leftovers straight from the fridge at midnight and it was still delicious. The Parmesan crust stays remarkably good cold. Not that I’m recommending that behavior. But I’m not not recommending it either.
Storing and Reheating
If you somehow have leftovers from this chicken cutlets recipe, store them in an airtight container in the fridge for up to 3 days. For reheating, skip the microwave — it’ll make the crust sad and soft. Instead, pop them in a 375°F oven for about 10 minutes, or give them a quick 2-minute hit in an air fryer if you have one. You get most of that crunch back, which honestly feels like a small miracle.
You can also freeze the cooked cutlets. Lay them flat on a baking sheet first, freeze until solid, then transfer to a zip-lock bag. Reheat straight from frozen in the oven at 400°F for 15–18 minutes. Meal prep win.
Make it ahead: You can bread the chicken up to 24 hours in advance and keep it covered in the fridge. The coating firms up nicely overnight, which actually helps it stay on during frying.
A Few Questions People Always Ask
Can I bake instead of fry?
You can! Bake at 425°F on a wire rack set over a baking sheet for about 18–20 minutes, flipping halfway. Spray or brush with olive oil before baking. You’ll get a solid crust, though it won’t be quite as deeply golden as the pan-fried version. Still really good though.
Can I use chicken thighs?
Absolutely — boneless skinless thighs work great here. They’re a little fattier, which means even more forgiving if you accidentally go a tiny bit over on cook time. Pound them to the same ½-inch thickness and follow the exact same process.
What if I don’t have Panko?
Regular breadcrumbs will work in a pinch, but Panko is genuinely worth picking up. It’s the difference between a crust that’s kind of golden and one that’s properly shattery and crunchy. You’ll notice the difference with your first bite.
And that really is all there is to it. This chicken cutlet recipe is proof that the best weeknight dinners aren’t complicated — they’re just made with a little technique and a lot of Parmesan. Whether you’re cooking for picky kids, impressing someone at dinner, or just treating yourself on a Tuesday night, these crispy golden cutlets show up for every occasion.
Make them once and you’ll understand why they’ve become a permanent fixture in so many home kitchens. There’s something genuinely satisfying about that first crunch.
Drop a comment below and tell me how yours turned out — I want to hear about those golden cutlets. 🍋

Chicken Cutlets Recipe
6
servings15
minutes5
minutes407
kcalPan-fried chicken breasts coated in a seasoned Panko–Parmesan crust. Shatteringly crunchy outside, tender and juicy inside.
Ingredients
2 lbs Boneless skinless chicken breasts (~4 breasts)
2 cups Panko bread crumbs
1 cup Parmesan cheese, finely grated
¾ cup All-purpose flour
3 large Eggs
2 tbsp Water
1½ tsp Salt, divided
1 tsp Black pepper
½ tsp Garlic powder
as needed Olive oil, for frying
Directions
- Trim any excess fat from the chicken breasts and slice them into approximately 8 even pieces.
- Place pieces between plastic wrap and pound with a meat mallet until each is approximately ½-inch thick.
In a shallow bowl, combine Panko, Parmesan, garlic powder, black pepper, and ¾ tsp salt. Stir to mix evenly.- In a second shallow bowl, whisk eggs with 2 tbsp water until smooth.
- Pour flour into a third shallow bowl. Set up your three-bowl breading station.
- Coat each piece in flour on both sides, then dip into the egg wash allowing excess to drip off.
- Press firmly into the breadcrumb mixture on both sides for full, even coverage. Set on a clean plate. Repeat for all pieces.
- Heat a thin layer of olive oil in a large skillet over medium-high heat to 350–375°F.
- Fry in a single layer (work in batches if needed) for 1–2 minutes per side until deep golden brown and internal temp reaches 165°F.
- Transfer to a paper towel-lined plate, sprinkle with the remaining ¾ tsp salt, and rest for at least 5 minutes before serving.